Shadow Box Project and More PixScan!
For my final ADORNit project this week, I was given this shadow box kit. I’ve got more details over on the ADORNit blog {here}! If you’re a Silhouette user, read on…
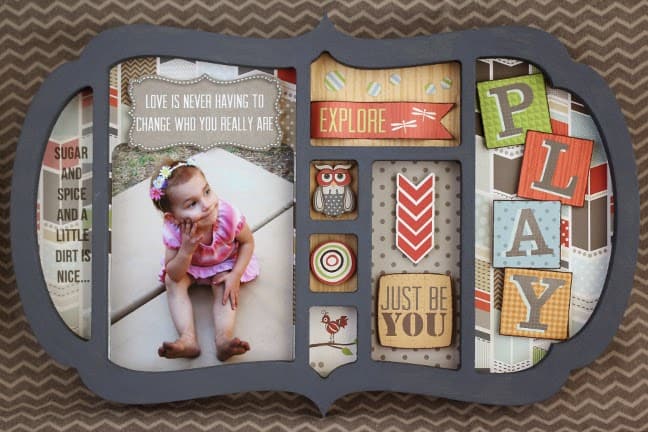
I used my Silhouette CAMEO PixScan™ mat a lot for this project, and I want to share how I used it to cut out most of these shapes with my CAMEO instead of cutting by hand. The kit came with a couple pages of designer paper, one of which is meant to have the elements cut out and used in the shadow box. I experimented with my new PixScan™ mat and was thrilled with the results!
First I decided which pieces I wanted to use, cut down the paper to include elements I wanted, and placed those pieces on the 8.5 x 11.75″ cutting area of the PixScan™ mat.
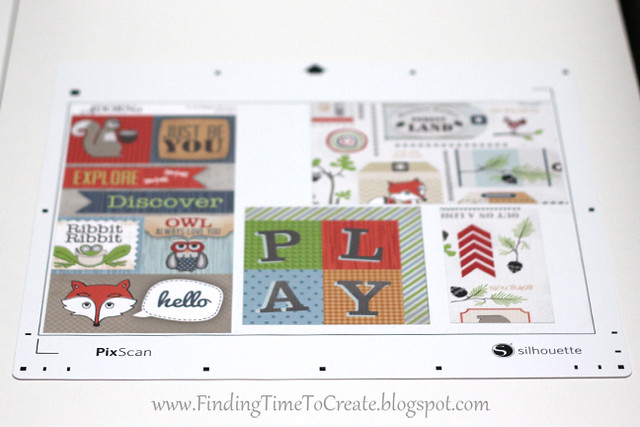
Then I scanned my mat with the paper using the steps in my blog post HERE. (I much prefer scanning over taking a picture with PixScan, by the way. I get much better precision on the cut lines with a scan compared to the preset calibration for my iPhone.)
After scanning and importing into Studio, you can choose different areas to trace. You can trace a lot at once, or separate bits at a time. Just remember you can Release the Compound Path on any trace you’ve completed in order to delete unwanted lines. And don’t forget to use your Point-Edit Tools to refine the cut lines created by your trace. I spent a bit of time perfecting my cut lines, but in the end I had cut lines for every shape I wanted on my mat.
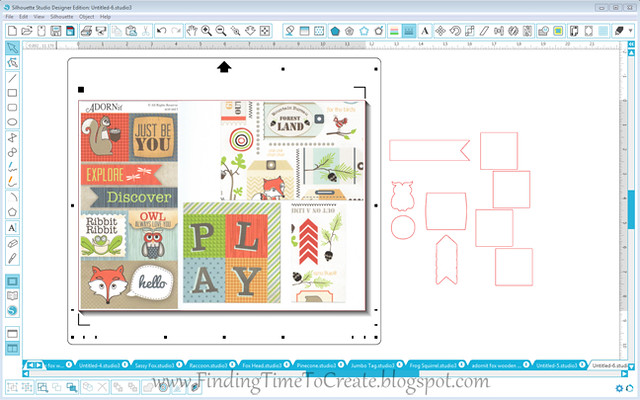
I’ve pulled the cut lines off to the side in the photo above so you can see them, but then I placed them back over their appropriate figures on the virtual paper on the screen. (I like how the software keeps your imported PixScan™ image in place as a background so you don’t accidentally move it as you work.)
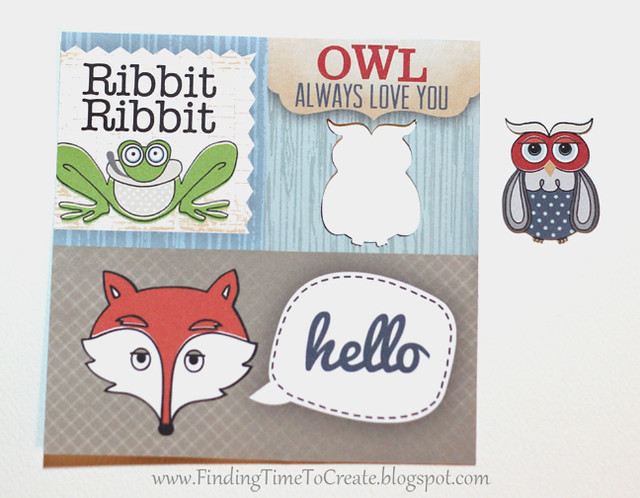
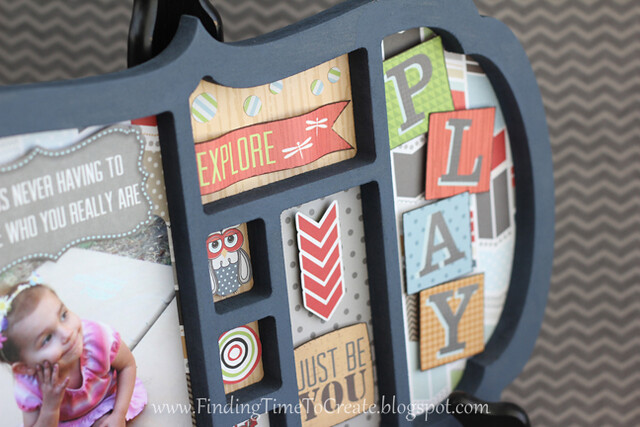
When the cut lines are in place over the virtual paper, you’re ready to cut it with your Silhouette machine as normal. (Choose a paper type and adjust your blade, then Send to Silhouette.) This is how precise the cut is. All of my shapes cut just as perfectly as this owl!
The only shape I had to cut with scissors was the grey tag over the photo in my finished shadow box. There was not enough contrast to trace that one. Everything else was cut with my CAMEO, thanks to my PixScan™ mat. Bye-bye, fussy cutting with scissors! (Well, mostly.)
I hope this tutorial was helpful in showing another way to use the PixScan™ mat. Please ask me in the comments if you have any questions.


I don't have a Cameo but it was interesting reading how you did this. Love the cute photo.
I am a follower.
slrdowney at hotmail dot com
Thanks for a great tutorial. I will be trying these ideas out as soon as I get the delivery of my PixScan mat. Hilary
Glad to hear it, Hilary. I hope your mat arrives soon!
What version of the Silhouette Software are you using? This is really cute!
Rhonda, I made this with version 3.1.417 but in the past week have updated to the newest 3.3.277. PixScan works just as well with the newer version.
I love this shadow box Kelly! So cute and you used the PixScan mat…fabulous!
Thanks, Guiseppa! 🙂
Such a cut idea! Such fun creating!!