Print & Cut Fishy Valentines
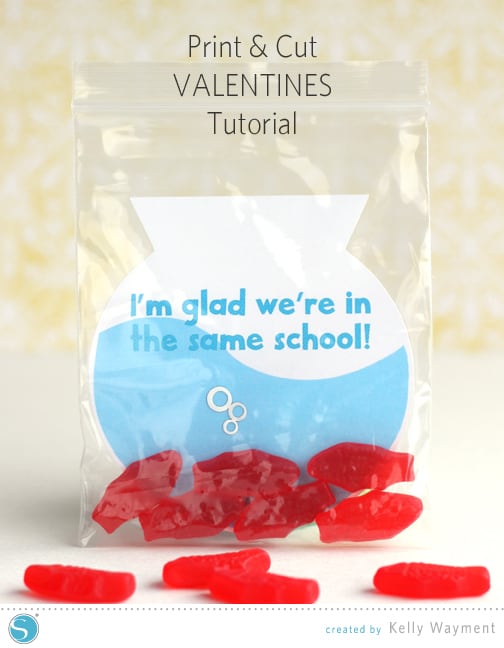
It’s been several consecutive years now that I’ve had to make between 75-90 valentines for my kids’ class parties, so we do simple. OK, it would be easier to just buy pre-made valentines, but where’s the fun in that? I would much rather put my CAMEO to work and have something unique to hand out to their friends, like these fishy valentines.
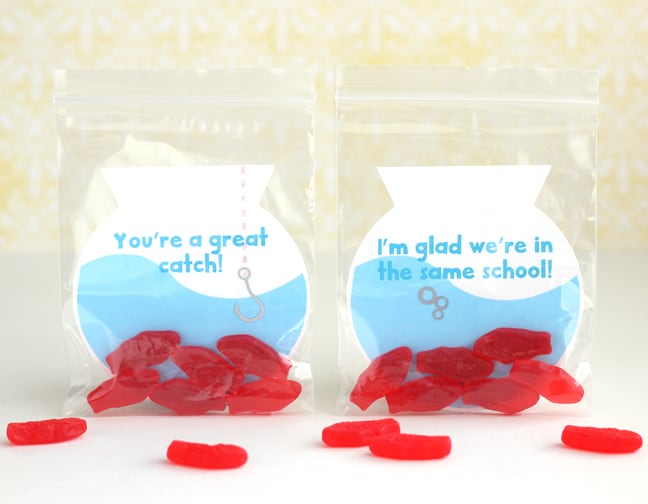
This year we are going with a fish theme using the print & cut feature of the Silhouette. Here’s how to make these easy valentines.
1. Open the pet fish set Color (Fill Color Window) and Resize (click and drag a corner handle) the water to fit the bowl. Group (select both, then right click – Group).
2. Resize the bowl and water to fit your bag. My bags are 4” x 5” so I made my bowl about 3.8” H x 3.658” W.
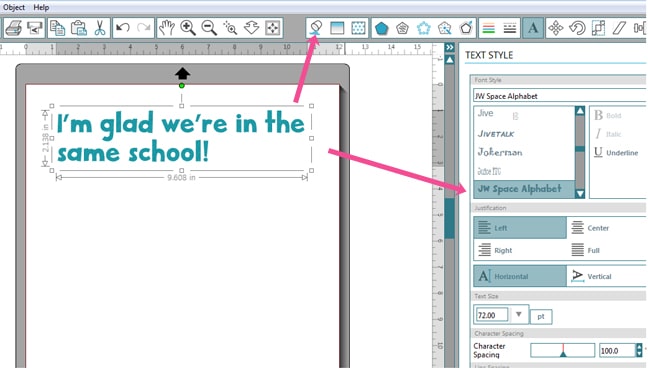
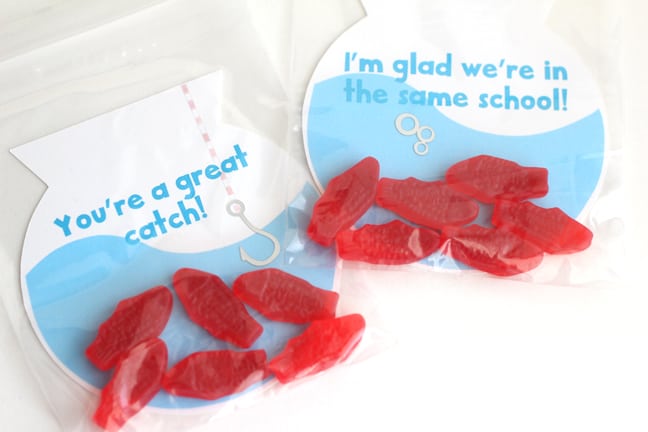
3. Type and resize some clever sayings like “I’m glad we’re in the same school!” and “You’re a great catch!” (Text tool & Text Styles Window)
- Type your text, then click off to the side to exit text-edit mode. Click the text once to select and choose a fill color and a font (I used JW Space Alphabet).
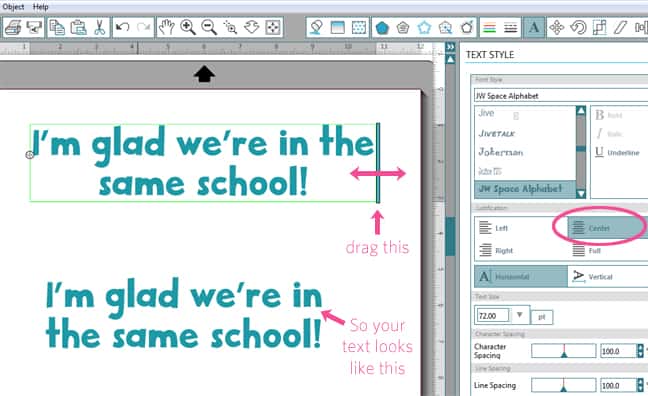
- Double-click the text to enter text-edit mode again. Choose “Center” for your text alignment, then click and drag the blue bar on the right side in towards the middle to have the text magically move down to the next row to fit the width you want.
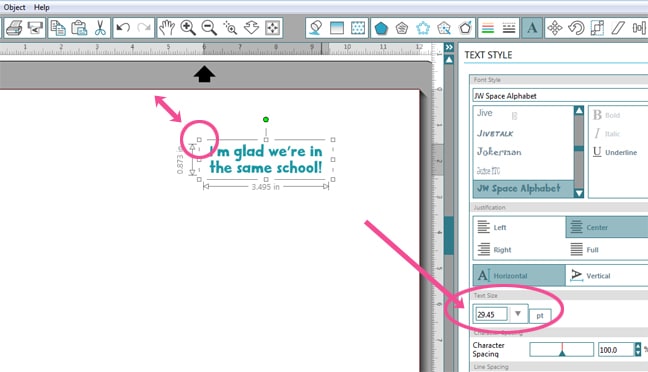
- Once you have your text looking the way you like it, click away again to exit text-edit mode. Now you can drag a corner handle to resize it to fit your bowl. (You can see the font size change as you resize the text.)
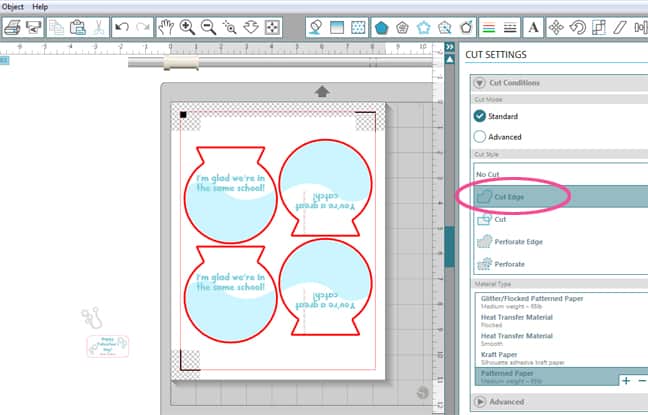
4. We’re almost done preparing our print & cut fish bowls! When you have everything positioned the way you want, be sure to Group it all, and then go to your Cut Settings Window and look at the preview (Standard mode). You don’t want to cut all those inner words or the water, so be sure to select the bowl and choose “Cut Edge.” You should only see the bold red cut lines around the outer edge.
5. As with any print & cut, you’ll need to set your paper size to reflect what you are printing and turn on your registration marks in the Registration Marks Window. I reduced all the top, bottom, right and left positions and was able to fit four fish bowls per page. Print on plain white cardstock, then put on the mat and send to your Silhouette.
6. For some extra elements that wouldn’t add a lot to the assembly time, I cut fish hooks and bubbles from printable silver foil.
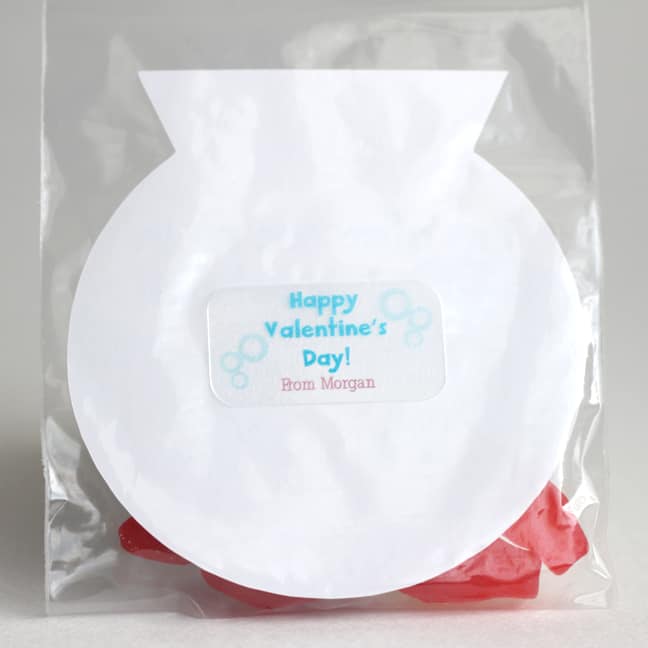
7. Finally, I cut labels for the back of each bag so my kids’ valentines would have their names on them. (More print & cut magic!) I used printable clear sticker paper, which is perfect for clear bags like these.
What kind of homemade valentines are you making with your Silhouette machine?
Designs Used:
- Pet fish set (#9740)
- Swimming fish (#43167)
- Worm on a hook (#30551)
- Hello friend stripe pattern (#34112)
- JW Space Alphabet (#57177)
Products (some affiliate links):
- Printable silver foil
- Printable clear sticker paper
- 4″ x 5″ plastic bags
- Silhouette CAMEO
- White cardstock
- Swedish Fish gummy candy
Originally featured on the Silhouette blog 2/2/2015 for the design team.
This post contains affiliate links. It won’t change your price, but it helps you by getting exactly the product I used, and it helps me by giving me a little kickback to help support this blog. Win-win. 🙂


That's such a fun idea!
Thanks, Kara Lynne!