Stenciled Flower Card
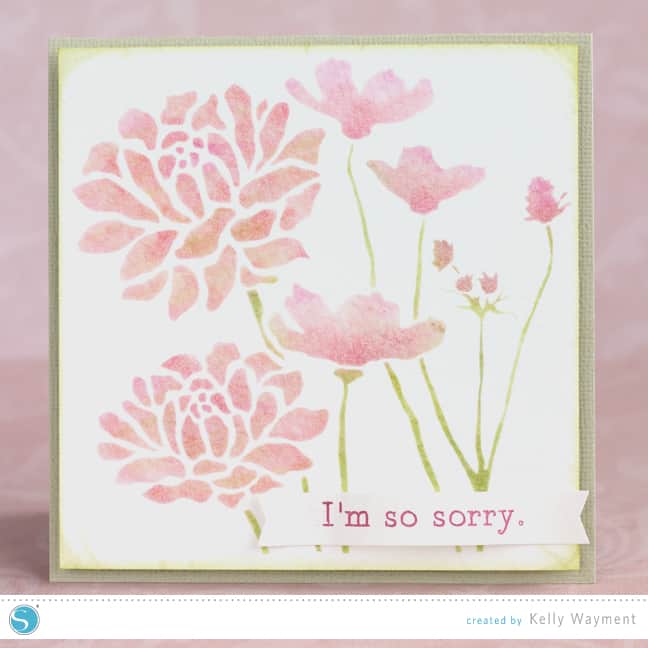
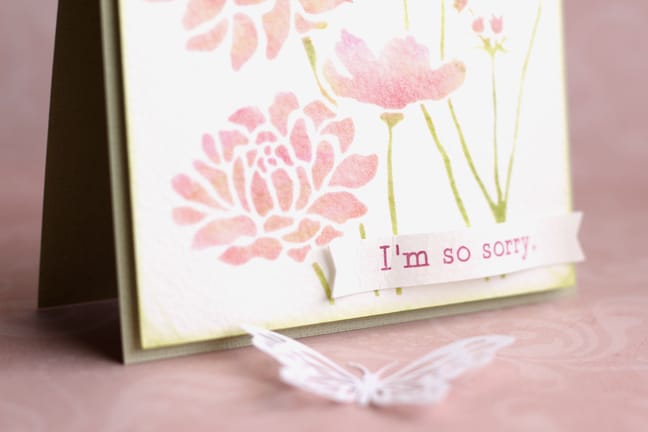
I made this card with Silhouette stencil material and dye-based stamping inks on watercolor paper. I love the blending I was able to accomplish and the texture from the watercolor paper. Stencils are so fun to use for flawless artwork! And now that I have the stencil cut out, I can make as many cards as I want with whatever color variations I want. So cool.
I’ve got a full tutorial for this project below (originally on the Silhouette Blog).
Do you need an elegant card for situations that call for a soft and gentle sentiment? I used Silhouette’s stencil material to create this 5″ card on watercolor paper. Here’s a tutorial for this simple process.
1- Open this bloom group shape in Silhouette Studio and draw a square around it with the rectangle drawing tool for your stencil’s edge.
2- Make sure the flowers are grouped, then center them within the square by choosing “Center” (top choice) in the Align Window. Group the flowers with the square.
3- Cut this shape from your stencil material. (It’s a good idea to do a practice cut to confirm your blade settings will work first.)
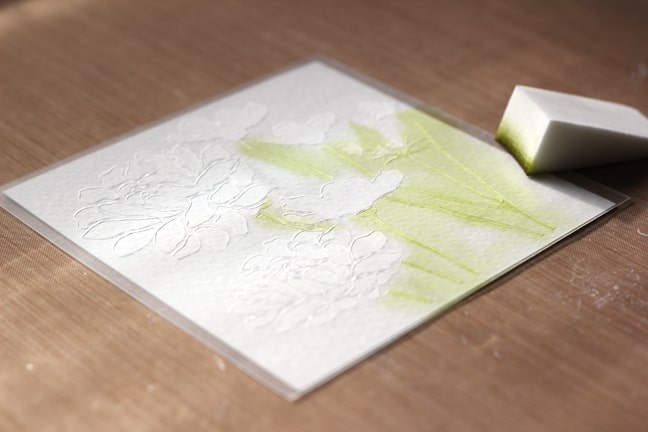
4- Weed out and dispose of the inner pieces, then remove the stencil from its backing and place it on your watercolor paper. (I used a heavy paper so the sticky stencil didn’t tear it, but if you’re concerned about a more lightweight paper, just dab the sticky part of the stencil on cloth first to remove some of the tackiness.)
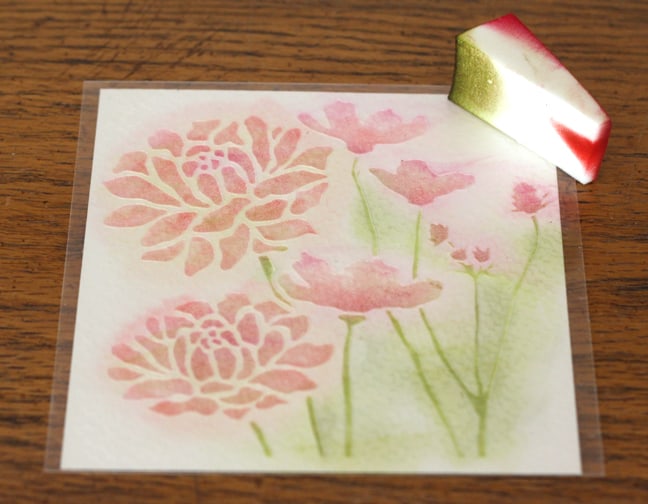
5- Dab a makeup sponge (or stamping dauber or similar sponge) onto an ink pad of your choice (mine were dye based) and transfer it to the appropriate parts of your stencil. (I used green for the stems and 2-3 shades of pink plus a little more green for the flowers).
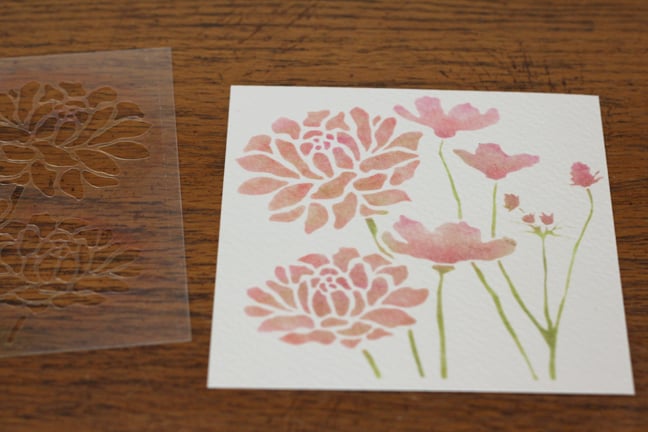
6- When your stencil is filled, remove the stencil from the paper. Now it’s ready to be added to your card base.
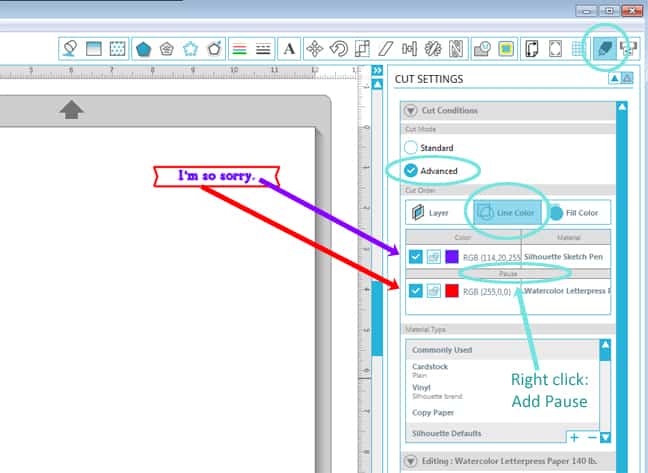
7- Sketch and cut a sentiment onto a flag shape with the same watercolor paper. Sketching with the advanced options in Studio 3.0 is simple.
- Choose your shape and place your text to be sketched inside the shape.
- Choose one line color for the text and a different line color for the shape.
- In your Cut Settings Window, click on Advanced for the Cut Mode, and choose Line Color for the Cut Order.
- Check the boxes for the two colors. Click on the material for the text’s line color (e.g. purple) and select Silhouette Sketch Pen as the material type.
- Click on the material for the cut shape’s color (e.g. red) and select your material type. I made custom settings for 140 lb. watercolor paper: Blade 8, Speed 2, Thickness 15, Double Cut.
- Your Silhouette machine will cut in order of line colors listed, so insert a pause after the sketch pen by right clicking on “Silhouette Sketch Pen” and choose Add Pause from the popup menu.
- Load the paper into your machine and put the sketch pen into the blade holder.
- Choose Send to Silhouette, and your Silhouette will sketch the text and then pause while you exchange the sketch pen for your blade. (Do not unload the mat.)
- Click Resume Cutting (not Start), and it will make the cut with the blade.
8- Curl the flag shape a little with your fingers and glue it to the card front.
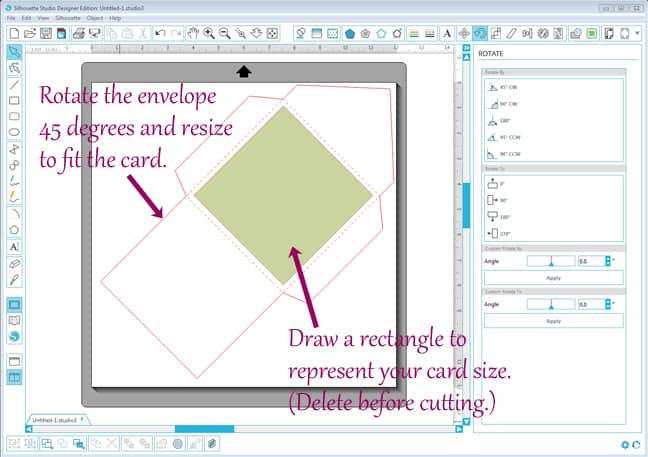
9- Tip: If you don’t have a square envelope to fit a large 5” card like this but you do have a 12” CAMEO, open this basic square envelope and resize it. Rotating the shape gives you extra room to fit the whole shape on your 12” mat.
Don’t forget that this stencil material is reusable, so you can make multiple cards from a single stencil. I made this card for an apology, but this design would be great for a set of sympathy cards to have on hand. Have you tried the stencil material yet?
Shapes and Fonts Used:
- Bloom group #32174
- Basic square envelope #42264
- Flags #34607
- Sketch Serif Font #53543


Beautiful card! And I love your tutorials.
Thank you, Shawna. 🙂
Kelly,
You are rocking the house with all these great projects. Glad to see that you are soaring with your Silhouette projects.
Jody B (Silhouette Plus users forum)
Thanks so much, Jody!
I just found a roll of Silhouette Stencil Vinyl in my stash that I didn't know I had, so I can't wait to give this a try! I have a question for you Kelly; I found some files in the Sil store that are called "overlays" and I am wondering if they would work well as a stencil using this technique? I'm not really sure what these overlay files are or how they are supposed to be used; am hoping maybe you know 🙂 Thanks for your help.