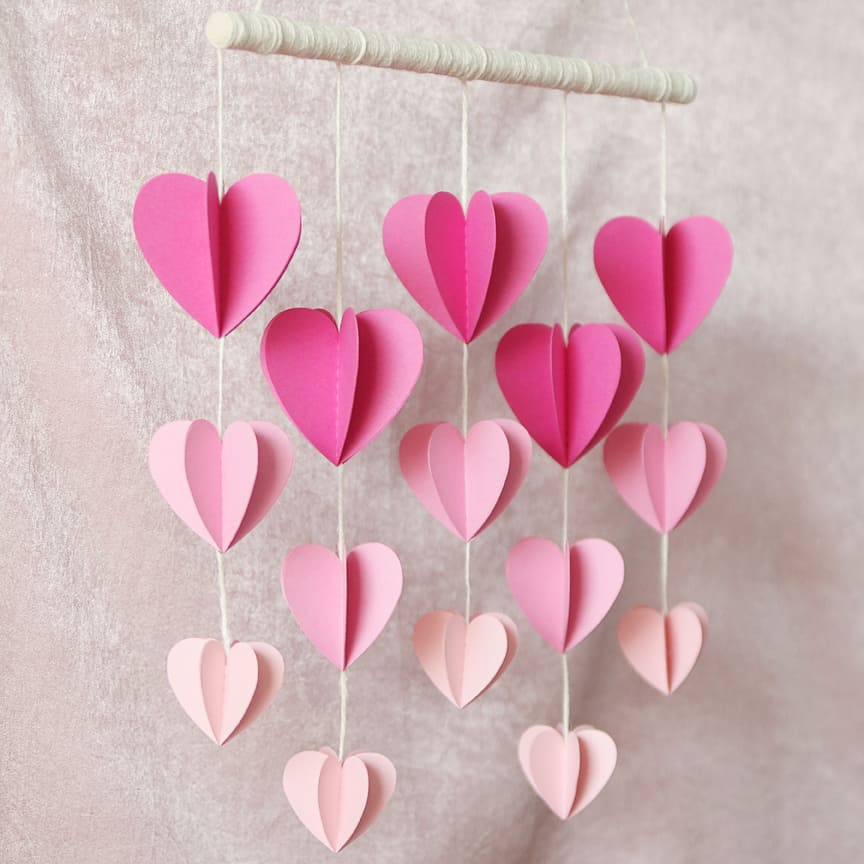
Paper Hanging Hearts Online Class

Happy New Year, everyone! We are off and running with my next premium online class through Michaels and Silhouette. This month’s class is a paper hanging hearts project that can be used as a wall hanging or a mobile. You can register for $15 here (expired).
Details:
Register to attend live online, or to gain access to the recording for watching later. Only those who register can access this premium class recording. (Download free written instructions here on Box.com.)
Class date & time: Jan. 19, 2022 @ 1 pm MT – Online
Class length: 1.5 hours
Class skill level: Intermediate
Recommended age: 13+
Class summary: In this premium class, I will guide you through this paper hanging hearts project from start to finish. You’ll learn some great software tips as you duplicate and organize the hearts to cut with your Silhouette machine. Then cut and assemble the pieces of this pretty wall hanging. I’ll use the Silhouette Cameo 4 in class, but you can do this project with a Portrait machine, as well.
Supply list:
- Silhouette Cameo or Portrait
- Cutting mat
- Autoblade or other 1mm blade
- Cardstock in 3 colors (Kelly is using an ombre pink selection)
- 3 letter-size sheets dark color
- 2 letter-size sheets medium color
- 1 letter-size sheet light color
- Jute twine
- Quick-dry tacky glue
- Adhesive tape runner
- 12” round wooden dowel (3/8” thick)
- Spatula tool
- Scissors
- Pliers
- Paperclip
- Ruler
- Pen or pencil for marking twine
- Damp cloth
- “Hanging Hearts” Design ID #
392798201057

Instructions:
(The class video is not available to those who did not register for the class. DOWNLOAD the free instructions PDF here at Box.com.)
Design:
Open design #201057 (previously #392798)
Page setup = letter size media, landscape orientation
Preferences = cut to edge of page
- Replicate 30 small hearts per page (1 page to cut) – group
- Replicate 20 medium hearts per page (1.5 pages to cut) – group
- Replicate 12 large hearts per page (2.5 pages to cut) – group
Note for Portrait users: choose portrait orientation and rotate hearts 90 degrees.
Cut:
- Cut 30 small hearts from the lightest cardstock color
- Cut 30 medium hearts from the medium cardstock color
- Cut 30 large hearts from the darkest cardstock color
Assembly:
- 6 heart pieces per finished heart (divide into 5 piles of 6 for each color)
- Fold and glue (tape runner) all but one connection to make 5 hearts of lightest color
- Fold and glue (tape runner) all but one connection to make 5 hearts of medium color
- Fold and glue (tape runner) all but one connection to make 5 hearts of darkest color
- Wrap dowel with twine from one edge to other (glue ends with white glue)
- At end (last several wraps) – wrap around looped wire and pull through
- Add white glue, trim excess with scissors
- Starting with smallest heart:
- Put tape runner adhesive on one side of heart
- Add glue down center line and a couple dots near the runner adhesive
- Add twine in center and poke in place with spatula tool
- Press together (wipe fingers on damp cloth)
- Add medium heart so twine between this and lower heart is 1.5” exposed twine
- Repeat with largest heart, leaving 1.5” exposed twine
- Leave 8” twine above largest heart and cut twine
- Repeat to make 5 total strands with 8” twine at top
- Evenly distribute strands along the dowel and tie off
- Add hanging string (30” twine) – constrictor knot
- Glue knots with white glue and dry before trimming
Other Michaels Classes:
Find my past (free) Michaels classes here:
- Holiday burlap sign
- Fall leaf wreath
- HTV baby bodysuit
- Shrink plastic keychain
- Stencil art
- Framed paper succulent
- Sketched card set
- Reverse canvas Halloween decor
- Customize your space with vinyl

This post contains affiliate links. Your price is the same, but I may receive a small commission when you use my links. Thanks for your support!

